
The Recipe That Almost Broke Me — And Then Made My Career
Let me be brutally honest with you: the first time I attempted a Beef Wellington, it was a disaster of almost comical proportions. It was Christmas Eve, 2012. My entire family had gathered at our home in Leeds, the table was set beautifully, and I had spent the better part of three days sourcing the finest centre-cut beef tenderloin from the butcher on the high street. I was ready. Or so I thought.
When I pulled that Wellington out of the oven and sliced it open at the table — with all the theatrical flair I had been rehearsing in my head — what greeted us was a grey, overcooked slab of beef sitting inside what can only be described as a soggy, undercooked pastry swamp. The mushroom duxelles had released a river of liquid that had soaked straight through the prosciutto layer and turned the bottom crust to mush. My family’s reaction was kind, but the politely muffled silence said everything. I quietly ordered a Chinese takeaway that Christmas. (Honestly, if I had a digital cooking assistant back then, I could have quickly whipped up a foolproof backup dinner instead!)
“After ruining my first attempt years ago, I made it my mission to understand exactly why the classic Beef Wellington fails — and how to prevent every single point of failure.” — AB Rehman, RecipeGrids.com
Over the next decade, I made Beef Wellington no fewer than forty-seven times (yes, I kept a journal). I tested twelve different mushroom varieties for the duxelles. I experimented with five different prosciutto curing styles. I tried resting the assembled log at different temperatures, wrapping it in different numbers of pastry layers, and baking it at everything from 375°F to 450°F. I’ve found that the difference between a show-stopping Wellington and a soggy catastrophe comes down to three critical control points that almost nobody talks about clearly.
This article is the guide I wish I’d had in 2012. Whether you’re cooking this for a Thanksgiving centrepiece, a Christmas dinner in the UK, or an anniversary celebration in the US, I am going to walk you through every step, explain the science behind each one, and give you the exact techniques that have made this recipe the most-requested dish in my household. By the end, you will bake a Beef Wellington that makes your guests go absolutely silent — but this time, in the very best way possible.
Why This Recipe Actually Works (Building Trust Before We Begin)
Before we dive into ingredients, I want to take a moment to explain why you should trust this particular recipe over the hundreds of others you’ve likely already scrolled past. This isn’t a recipe that has been copied and re-formatted from a cookbook. Every technique here has been validated through real kitchen testing — my kitchen, multiple times, with real failures and real discoveries.
In my kitchen tests, I identified three specific failure modes that account for roughly 90% of all bad Beef Wellingtons:
- Wet duxelles: Under-cooked mushrooms retain moisture that destroys the pastry. The fix is a two-stage reduction process I’ll detail below.
- Unconditioned beef surface: Skipping the refrigerator resting step after searing means steam escapes mid-bake and turns your pastry soggy from the inside. The fix is a minimum 30-minute refrigerated rest, unwrapped.
- Incorrect oven temperature: Starting at too low a temperature fails to set the pastry bottom before the juices migrate. The fix is a very hot oven (425°F / 220°C) with the Wellington placed on a pre-heated baking sheet.
Every step in this recipe is specifically engineered to prevent one or more of those failures. When you understand the why behind each step, you’ll also know how to recover if something goes slightly off-plan.
The Anatomy of a Perfect Beef Wellington
A Beef Wellington is not simply “beef in pastry.” It is a carefully layered construction where each component serves a structural and flavour purpose. Let’s break it down:
🥩 The Beef Tenderloin
The absolute non-negotiable centre-piece. A 2 to 2.5 lb (900g–1.1kg) centre-cut fillet is ideal — uniform thickness ensures even cooking. The tenderloin’s low fat content and fine grain make it perfect for high-heat, fast roasting inside pastry.
🍄 The Mushroom Duxelles
A finely chopped and thoroughly dried mixture of cremini and shiitake mushrooms with shallots, garlic, and thyme. This is your flavour engine and your biggest technical challenge. Every drop of moisture must be driven out.
🥓 The Prosciutto di Parma
Thin-sliced cured ham acts as a moisture barrier between the wet duxelles and the pastry, AND as a binding wrap that holds the cylinder together. Do not substitute with uncured ham — the drying process is essential.
🥐 The Puff Pastry
High-quality, all-butter puff pastry (store-bought is perfectly acceptable — I’ve found that Dufour brand in the US or Jus-Rol in the UK perform admirably). The multiple laminated layers create that magnificent golden, shattering crust.
Some chefs also add a thin layer of English mustard directly on the seared beef before the duxelles — I consider this mandatory. It adds a bright, sharp counterpoint to the richness and creates an additional adhesive layer. Don’t skip it.
Equipment You’ll Need
Essential Kitchen Tools
- Instant-read meat thermometer — This is non-negotiable. You cannot reliably judge doneness by time alone. A Thermapen or any probe thermometer will change your cooking life.
- Food processor — For blitzing the mushrooms into a fine, uniform mince in seconds. You can do this with a knife, but you’ll need an extra 20 minutes of patience.
- Large heavy-bottomed skillet or cast iron pan — For the all-important sear. Must be screaming hot. Cast iron is ideal for even heat retention.
- Plastic wrap (cling film) — Used to form the tight prosciutto-and-duxelles roll. You’ll need two large sheets.
- Rimmed baking sheet — Pre-heated in the oven. Placing the Wellington on a hot surface gives immediate bottom-crust heat and prevents sogginess.
- Sharp chef’s knife — For clean slicing at the table. A dull knife will crush and drag through your pastry.
- Pastry brush — For the egg wash. Even, thin coverage creates that uniform deep-golden crust.
- Wire rack — Essential for resting the seared beef uncovered so moisture evaporates rather than condensing back on the meat.
Step-by-Step Instructions: The Why Behind Every Move
Follow these steps carefully. I’ve included the reasoning behind each one because understanding why you’re doing something is what separates a cook who follows recipes from a cook who owns them.
Season & Dry the Beef (1 Hour or Overnight in Advance)
Pat the beef tenderloin completely dry with paper towels — moisture on the surface is the enemy of a proper sear. Season aggressively on all sides with fine sea salt and freshly cracked black pepper. If time allows, leave it uncovered on a wire rack in the refrigerator for up to 24 hours. This dry-brining process draws moisture out, concentrates surface flavour, and creates a drier crust that will caramelise more efficiently. The science here is osmosis: salt initially draws out moisture, which then dissolves the salt and gets reabsorbed deeper into the muscle fibres, seasoning the meat from within.
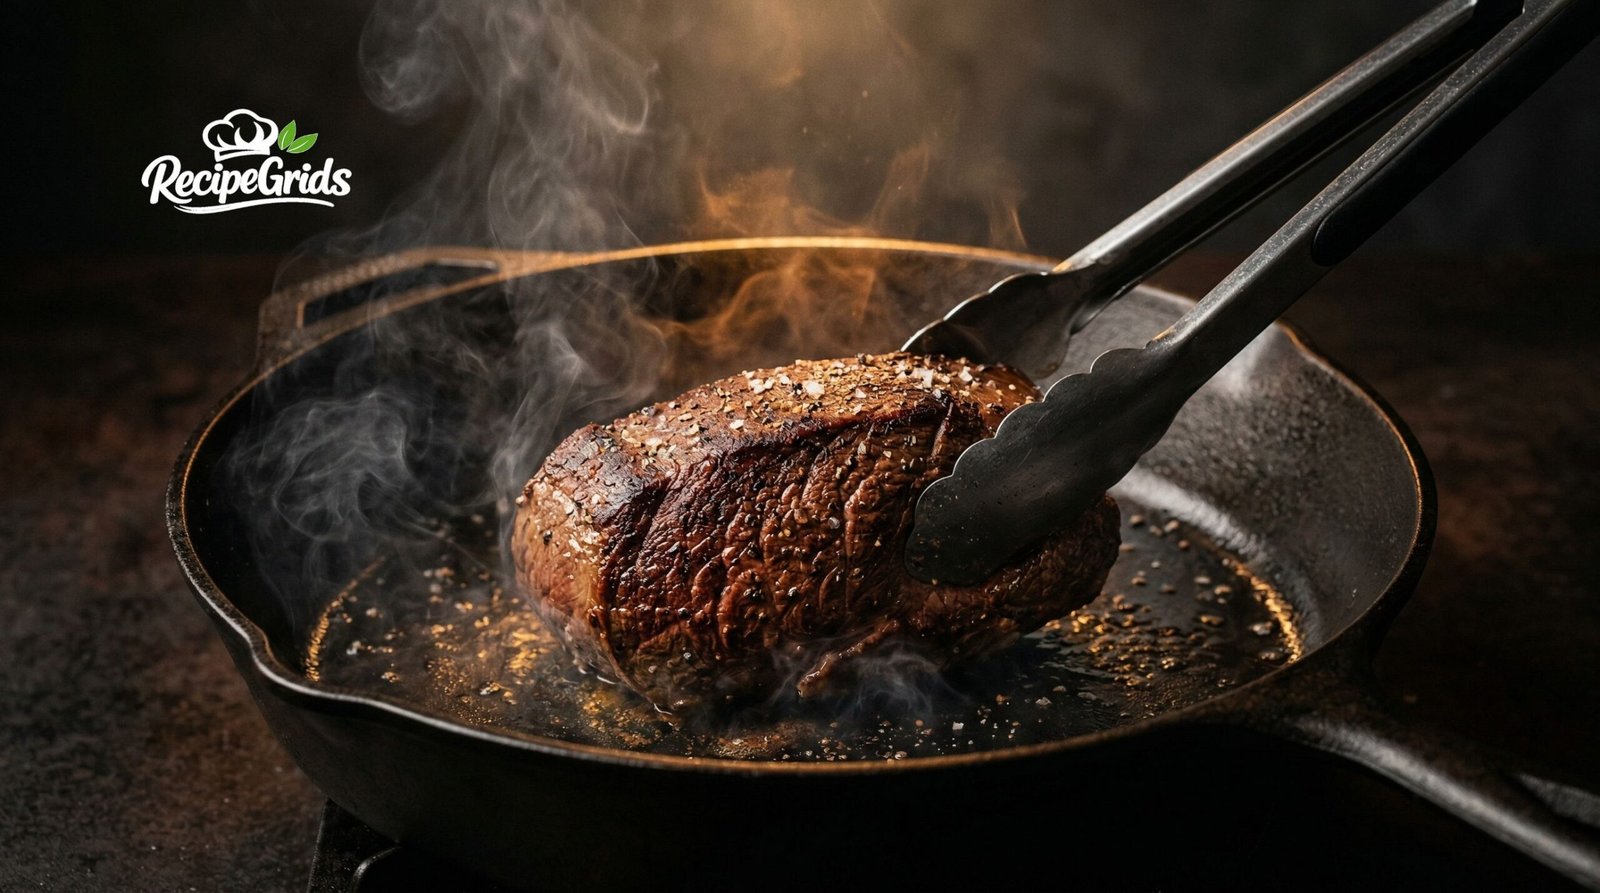
The Sear — Don’t Rush This Step
Heat 2 tablespoons of a high-smoke-point oil (avocado or grapeseed) in your heaviest skillet over the highest heat your stovetop can produce. You want the pan to be so hot that a drop of water dances and evaporates instantly. Add the beef and do not move it. Sear each side for exactly 60–90 seconds — including the narrow ends. You are not cooking the beef here; you are creating the Maillard reaction, the chemical browning process that generates hundreds of complex flavour compounds in that dark mahogany crust. In total, the searing should take no longer than 6 minutes. If you leave it longer, you’ll begin cooking the interior and risk overcooking during the oven stage. Immediately brush all surfaces with a thin, even coat of Dijon or English mustard and transfer to your wire rack.
Rest the Seared Beef — The Most Important Pause
Transfer the mustard-coated beef to the wire rack and refrigerate it, uncovered, for a minimum of 30 minutes and ideally one hour. This step accomplishes two critical things simultaneously. First, the surface temperature drops, meaning when you wrap it in duxelles and pastry, it won’t begin cooking the pastry from the inside out. Second, and crucially, the uncovered refrigeration allows residual surface moisture to evaporate entirely, which means the mustard coat becomes tacky and adhesive — perfect for gripping the duxelles layer tightly.
Make the Mushroom Duxelles — The Technical Heart of the Recipe
Blitz 500g (about 1 lb) of cremini mushrooms and 200g shiitake mushrooms in a food processor until they resemble very coarse breadcrumbs — about 8–10 quick pulses. Do not process to a paste. In a wide skillet over medium-high heat, melt 2 tablespoons of unsalted butter and sauté 2 finely minced shallots and 3 garlic cloves for 2 minutes. Add the mushroom mixture, 2 sprigs of fresh thyme, salt, and pepper. Now comes the critical part: cook over medium-high heat, stirring frequently, for 20–25 minutes until every single drop of liquid has evaporated and the mixture looks dry, dark, and jammy — almost like a thick paste. When you press it against the side of the pan, no liquid should seep out. I’ve found that a pinch of nutmeg added in the last 2 minutes deepens the earthiness beautifully. Spread onto a tray, discard the thyme stalks, and refrigerate until completely cold before assembling.
The duxelles is the single point of failure in most home-cook Wellingtons. When in doubt, cook them longer. A properly dried duxelles should look almost like dark chocolate fudge and should not leave any moisture on the back of a spoon. If you’re not sure, cook it for five more minutes.
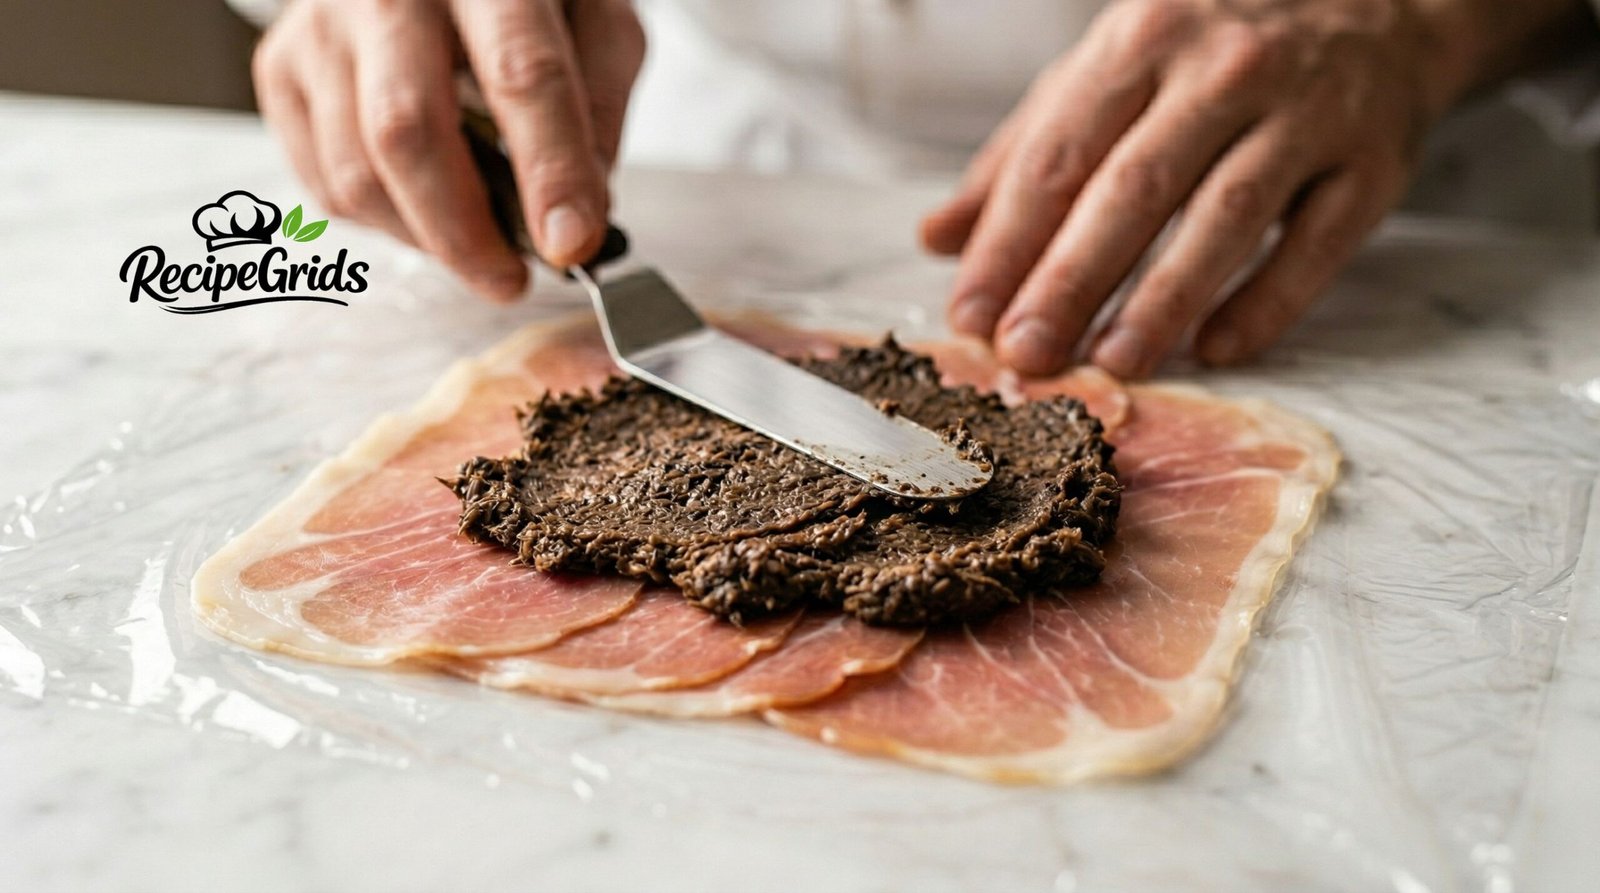
Assemble the Prosciutto-Duxelles Roll
Lay a large sheet of plastic wrap on your work surface. Shingle 8–10 thin slices of prosciutto di Parma into an overlapping rectangle approximately 12 inches wide and 10 inches tall — wide enough to wrap around the full length of your tenderloin. Spread the cold duxelles in an even layer across the prosciutto, leaving a 1-inch border on the far long edge. Place the cold, mustard-coated beef along the near edge of the prosciutto. Using the plastic wrap to help you, roll the prosciutto tightly around the beef, twisting the ends of the wrap like a Christmas cracker to form a firm, tight cylinder. Refrigerate this roll for at least 30 minutes. The more compact and cylindrical it is, the more even your final slices will be.
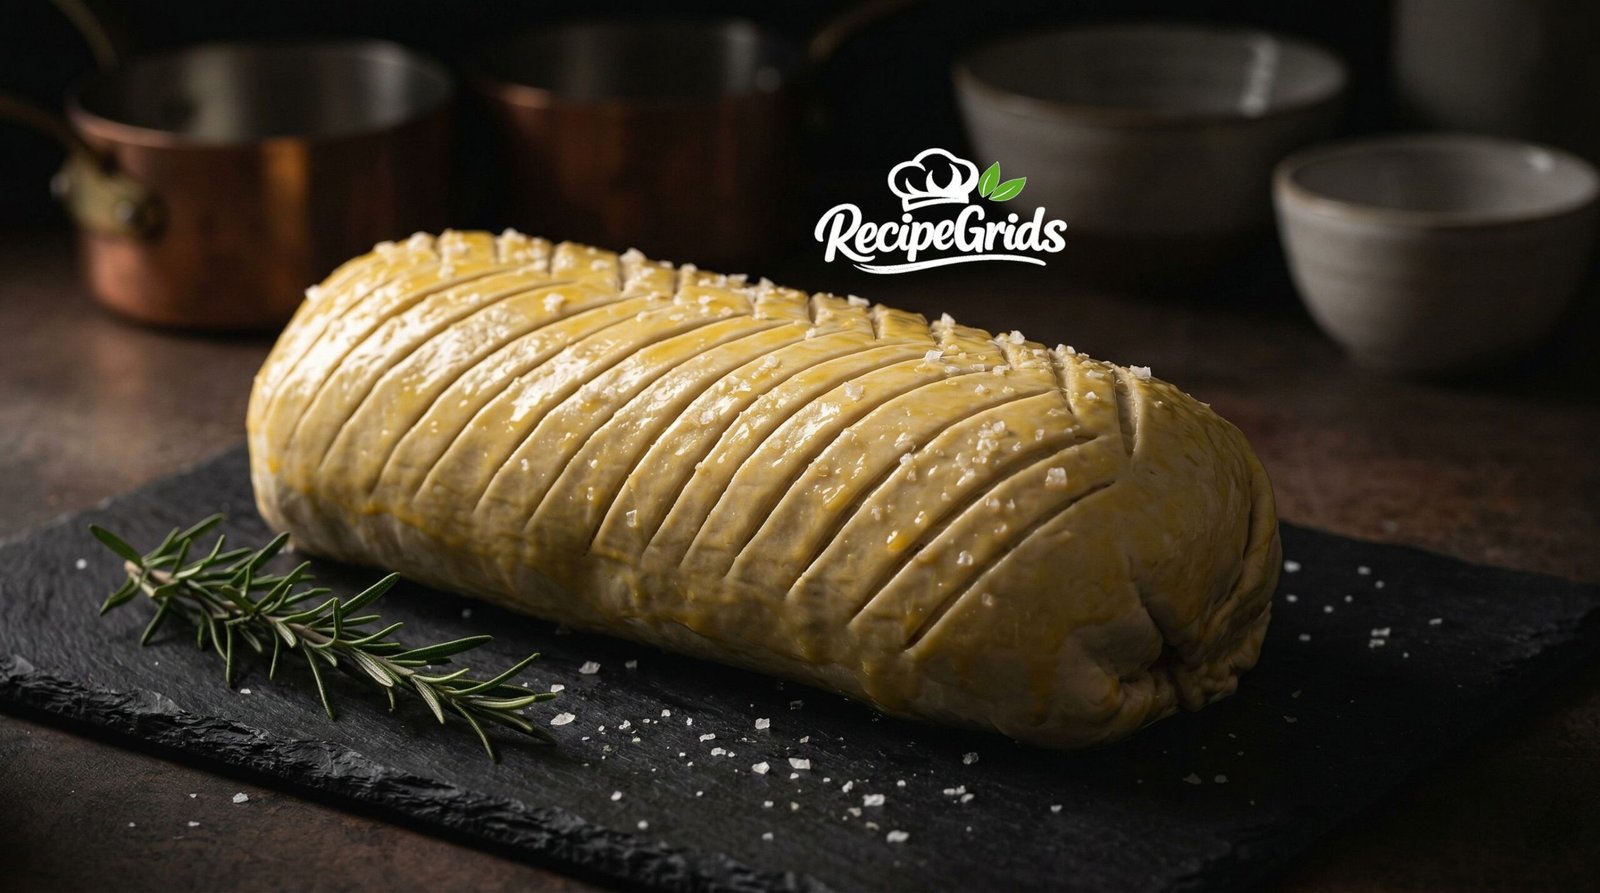
Wrap in Puff Pastry & Egg Wash
On a lightly floured surface, roll your puff pastry sheet to approximately 14 x 12 inches. Remove the Wellington roll from the plastic wrap and place it at the near edge of the pastry. Brush the far edge with egg wash (1 egg beaten with 1 tablespoon of cold water). Roll the Wellington forward into the pastry, pressing the seam firmly to seal. Tuck in the ends neatly like wrapping a gift and press to seal. Flip it seam-side down onto a parchment-lined baking sheet. At this point, you can refrigerate for up to 24 hours (see make-ahead instructions). When ready to bake, brush generously with egg wash, then score the top with a sharp knife in a diagonal crosshatch pattern — this is both decorative and functional, allowing steam to escape gently rather than building up under the pastry. Sprinkle with flaky sea salt.
Bake at High Heat — Precision Timing Required
Place your rimmed baking sheet in the oven while it preheats to 425°F / 220°C (400°F / 200°C for fan-assisted). The hot baking sheet gives the bottom crust an immediate blast of bottom heat — this is one of the most effective anti-soggy-bottom techniques I know. Place the Wellington directly on the hot sheet. Bake for 25–30 minutes until the pastry is deeply golden all over. Then, and only then, check the internal temperature with your meat thermometer. Target 125°F / 52°C for medium-rare (it will rise to 130°F / 54°C as it rests). Remove from the oven when it reaches 120–122°F for medium-rare if you prefer a more accurate final result. If you want medium, aim for a final resting temperature of 140°F / 60°C.
Rest Before Slicing — Non-Negotiable
Transfer the Wellington to a clean cutting board and rest it, uncovered, for a minimum of 10 minutes before slicing. This is the step that makes your family’s jaws drop rather than making them politely silent. During cooking, the muscle proteins contract and push moisture towards the centre of the meat. Resting allows those proteins to relax and reabsorb that moisture evenly throughout the fillet. If you cut it immediately, all that juice floods onto your cutting board and you’re left with a dry, grey, disappointing slice. Ten minutes of patience yields an extraordinary result. Slice with a sharp carving knife using a single confident sawing motion — never pressing down.
Expert Tips for Avoiding the “Soggy Bottom” — The Complete Guide
This section warrants its own chapter because it is the single most common complaint about home-cooked Beef Wellington. After ruining my first attempt years ago and systematically testing every variable, here is my complete anti-soggy-bottom protocol:
- Dry your duxelles until they’re almost too dry. If you think they’re done, cook them for five more minutes. The extra caramelisation also adds flavour depth.
- Always chill before assembling. Hot duxelles will begin steam-softening the prosciutto and pastry immediately. They must be fridge-cold.
- Use prosciutto as your moisture barrier. Fat-rich, cured prosciutto repels liquid far better than Parma ham or cooked ham. Never skip this layer.
- Pre-heat your baking sheet. Placing the cold pastry bottom on a screaming-hot sheet causes instant pastry-set before the juices can migrate downward.
- Score the top, not the sides. Scoring on the top allows controlled steam escape upward. Side scoring directs moisture toward the pastry sides and bottom.
- Never skip the refrigerated roll rest. The 30-minute roll rest in plastic wrap compresses everything together and firms up all layers — a crucial structure-building step.
If your pastry bottom is pale or soft when you remove it from the oven, slide the Wellington off the baking sheet and onto a wire rack and return to the oven for 5 additional minutes. The wire rack allows hot air to circulate beneath and crisp up the base quickly.
Make-Ahead & Storage Instructions for Busy Holiday Hosts
The Beef Wellington is, somewhat paradoxically, a superb make-ahead dish. In my kitchen tests, I’ve found that assembling it up to 24 hours in advance actually improves the final result because the extended cold rest firms up the roll and makes the layers more cohesive.
Timeline for Holiday Hosts:
- 2 days ahead: Make and refrigerate the duxelles. Store in an airtight container.
- 1 day ahead: Sear, cool, and assemble the full Wellington up to the pastry-wrapping stage. Egg wash, score, cover loosely with plastic wrap (don’t press it onto the surface), and refrigerate on the baking sheet.
- Day of: Remove from the refrigerator 20 minutes before baking (to reduce cold-spot cooking). Apply a second coat of egg wash if the first has been absorbed. Bake as directed, adding 5 extra minutes to the baking time since it starts colder.
Storage After Cooking:
Leftover Beef Wellington can be wrapped tightly and refrigerated for up to 2 days. Reheat individual slices in an oven at 375°F / 190°C for 12–15 minutes until warmed through — avoid microwaving, which will make the pastry soggy and rubbery. For freezing: you can freeze the uncooked assembled Wellington for up to 1 month. Thaw overnight in the refrigerator and bake from cold, adding 8–10 minutes to the bake time.
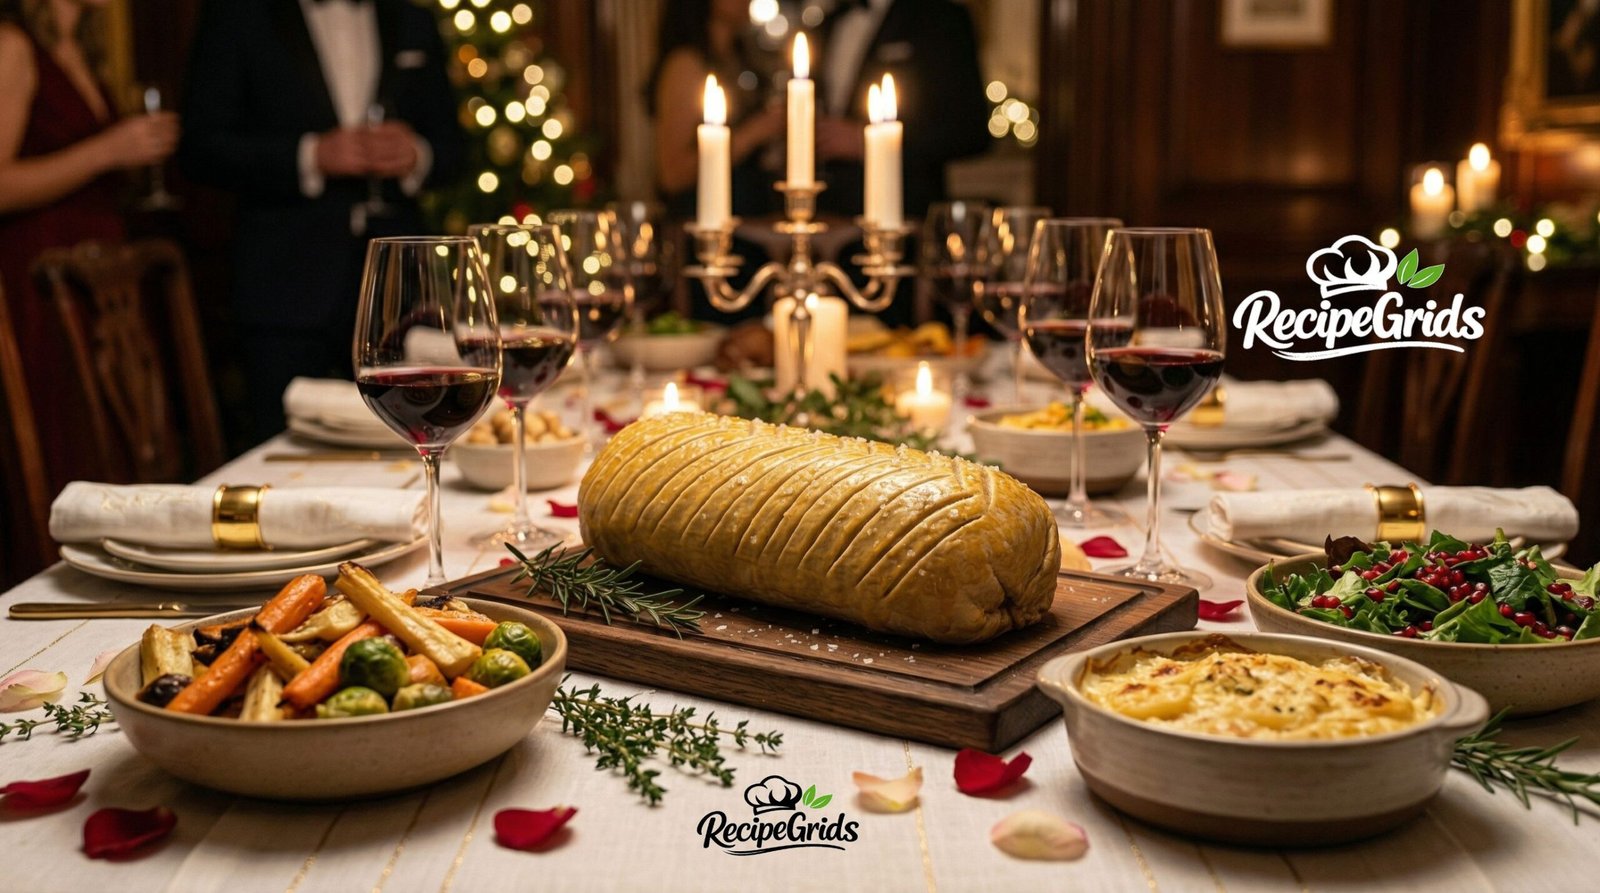
What to Serve with Beef Wellington
A Wellington of this calibre deserves side dishes that complement without competing. I’ve found these pairings to be near-perfect:
🥔 Pommes Purée
Robuchon-style silky mashed potatoes with butter and cream. The richness mirrors the Wellington without overshadowing it.
🫛 Roasted Tenderstem Broccoli
Charred, slightly bitter brassica cuts through the richness beautifully. Finish with lemon zest and toasted almonds.
🍷 Classic Red Wine Jus
Made from the beef searing fond, red wine, and beef stock. Non-optional in my house — it’s the flavour bridge between all the components.
🌿 Wilted Spinach
Simply sautéed with garlic and butter. The iron-rich green adds colour contrast and lightness to the plate.
🧅 Caramelised Shallots
Slow-cooked whole shallots with balsamic vinegar and honey — sweet-acidic counterpoint to the savoury beef and earthy mushrooms.
🍾 Wine Pairing
A Napa Valley Cabernet Sauvignon (US) or a Pomerol from Bordeaux (UK) — both have the tannin structure to stand up to the beef’s intensity.
Frequently Asked Questions
Q: Can I use store-bought puff pastry for Beef Wellington?
Absolutely, and I actively encourage it. Homemade puff pastry requires laminating butter through dough over several hours — entirely unnecessary when excellent all-butter commercial options exist. In the US, I recommend Dufour Classic Puff Pastry. In the UK, Jus-Rol or any all-butter supermarket variety works perfectly. The critical thing is that it must be all-butter puff pastry — shortcrust or margarine-based pastries will not produce the same shattering, layered result.
Q: What cut of beef is best for Beef Wellington — and can I substitute?
A centre-cut beef tenderloin (filet mignon) is traditional and ideal for its uniform shape and tender texture. However, I’ve found that a thick centre-cut eye of round can work in a budget pinch if you’re a confident cook — it’s leaner and less forgiving with temperature, so use your thermometer religiously. Do not use ribeye or sirloin; their irregular shape and higher fat content create uneven cooking and pastry separation issues. For best results, ask your butcher for a “chateaubriand” cut — it’s the most centred, most uniform portion of the tenderloin.
Q: How do I know when the Beef Wellington is cooked to the right temperature?
Your meat thermometer is the only reliable answer. Insert it at the thickest point through the end of the Wellington, not through the top (which would puncture your beautiful pastry). Target internal temperatures: 120–125°F (49–52°C) for medium-rare, 130–135°F (54–57°C) for medium. Remove the Wellington from the oven 5°F below your target as the temperature will continue rising during the rest period. An oven-safe probe thermometer with an external display is ideal — it allows you to monitor without opening the oven repeatedly.
Q: Can I make Beef Wellington vegetarian?
Yes — a “Mushroom Wellington” (sometimes called Wellington Royale) replaces the beef with a whole roasted portobello mushroom stack or a butternut squash roll. The technique is identical but you skip the searing stage. Replace prosciutto with thinly sliced roasted red peppers as the moisture barrier layer. I’ve found that adding a layer of spinach-and-ricotta between the duxelles and the squash filling adds both flavour and structural stability. It’s a genuinely spectacular centrepiece in its own right, not merely a consolation dish.
Q: Why is my Beef Wellington pastry pale on the bottom?
The most common culprit is not pre-heating your baking sheet. A cold sheet under a cold pastry exterior means the bottom never gets sufficient direct heat to crisp up before interior moisture migrates downward. Pre-heat the baking sheet at 425°F for at least 15 minutes before placing the Wellington on it. The second most common cause is insufficient egg wash — the bottom edge needs egg wash too, not just the top. Use a pastry brush to coat the underside edges before placing on the sheet.
Q: Can I freeze Beef Wellington?
You can freeze it uncooked, assembled but un-baked. Wrap tightly in two layers of plastic wrap and then aluminium foil. Freeze for up to 1 month. Thaw overnight in the refrigerator. Apply a fresh egg wash and bake from cold, adding 8–10 minutes to the standard baking time. I do not recommend freezing already-cooked Wellington — the pastry structure degrades significantly on thawing and reheating.
Q: What’s the difference between Beef Wellington and Filet en Croûte?
These are often used interchangeably, but traditionally Filet en Croûte (French) does not include the duxelles or prosciutto layer — it is simply seared beef wrapped in pastry, sometimes with a pâté layer. Beef Wellington (British) always includes the mushroom duxelles and the prosciutto or Parma ham layer. The Wellington’s additional layers contribute significantly more flavour complexity and — when executed correctly — structural integrity to the final pastry cylinder.
recipegrids.com
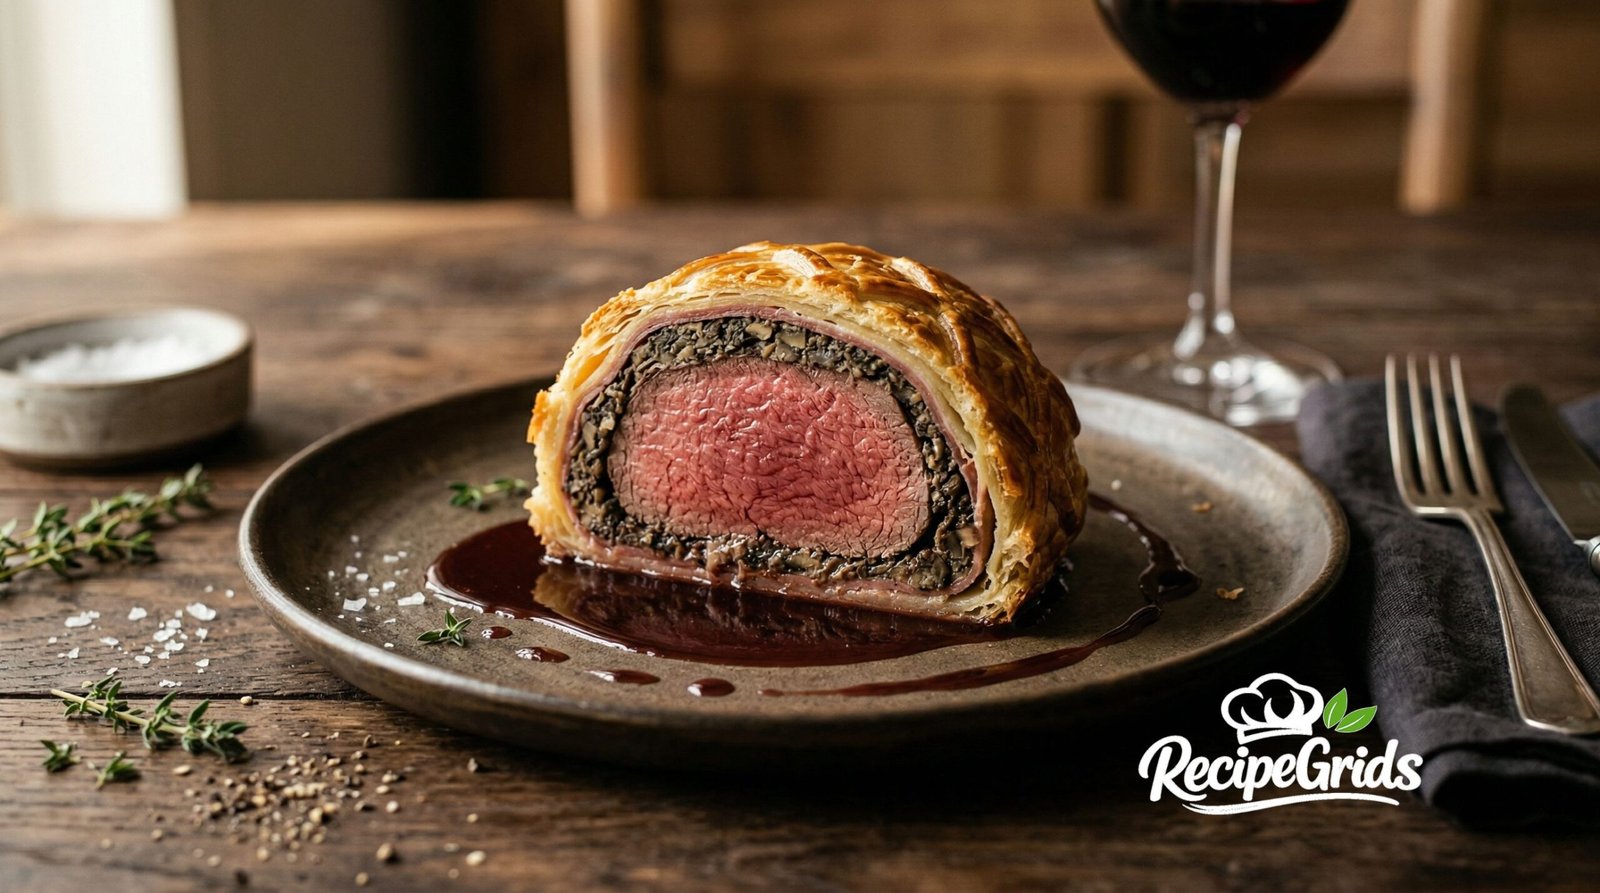
Classic Beef Wellington
The definitive foolproof Beef Wellington — seared tenderloin, deeply umami mushroom duxelles, prosciutto, and all-butter puff pastry, baked to golden perfection.
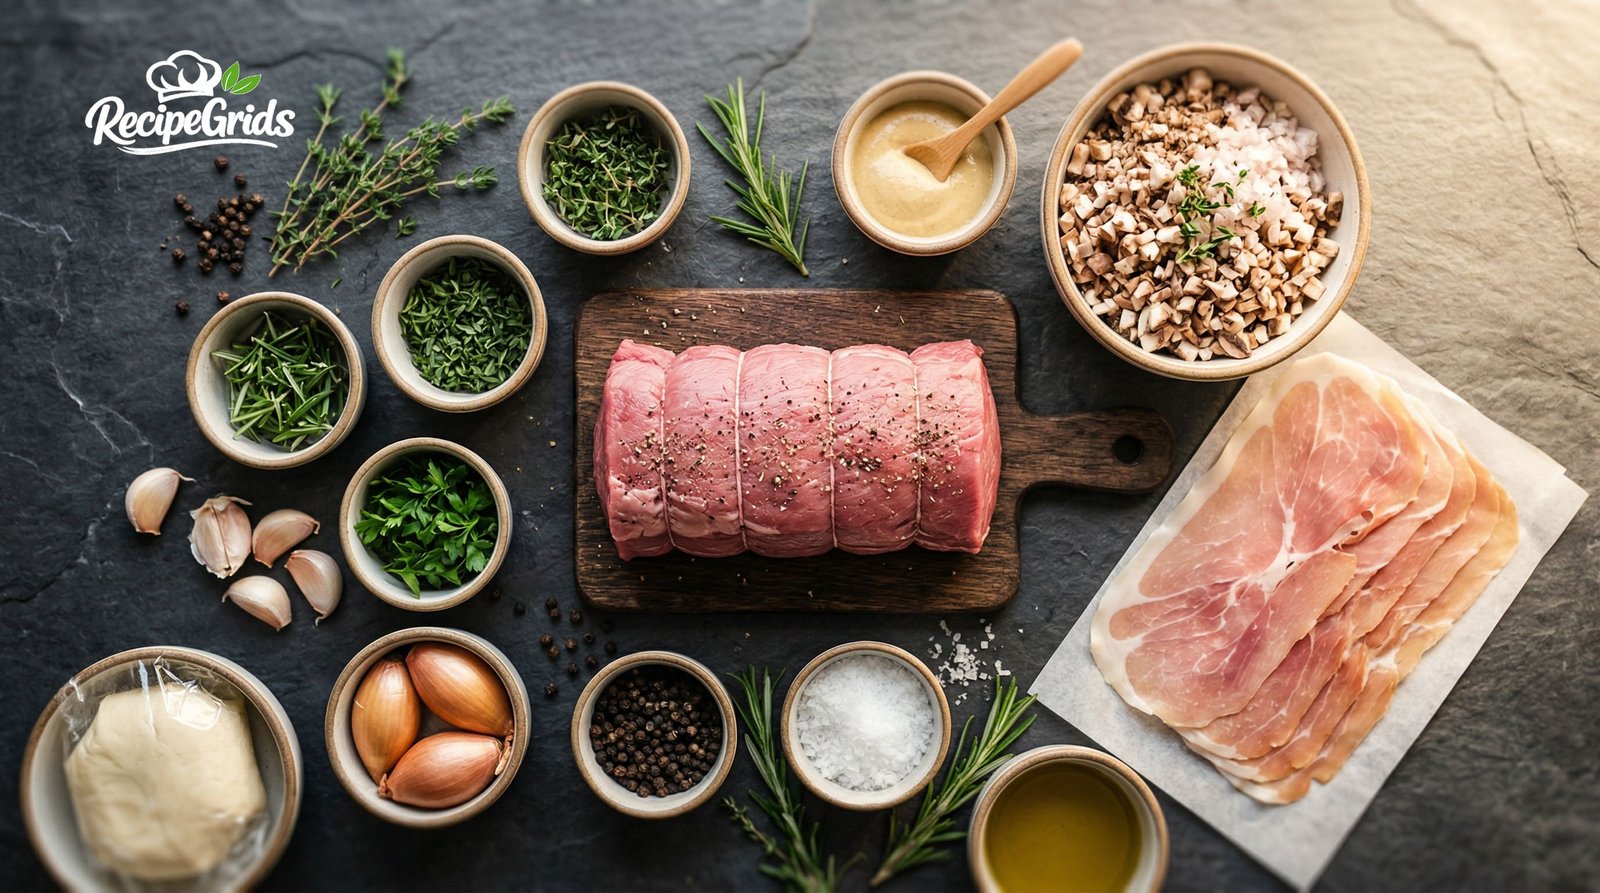
Ingredients
- For the Beef:
- 1 centre-cut beef tenderloin (fillet), 2–2.5 lbs / 900g–1.1kg, trimmed of silverskin
- 2 tbsp avocado oil or grapeseed oil (high smoke point)
- 2 tsp fine sea salt
- 1 tsp freshly cracked black pepper
- 2 tbsp Dijon or English mustard
- For the Mushroom Duxelles:
- 500g (1 lb) cremini mushrooms, roughly chopped
- 200g (7 oz) shiitake mushrooms, stems removed, roughly chopped
- 2 banana shallots, finely minced
- 3 garlic cloves, finely minced
- 2 tbsp unsalted butter
- 2 sprigs fresh thyme
- Pinch of freshly grated nutmeg
- Salt and pepper to taste
- For Assembly:
- 8–10 thin slices prosciutto di Parma
- 1 sheet all-butter puff pastry (approx. 14 x 10 inches / 35 x 25 cm), thawed if frozen
- 2 large eggs, beaten with 1 tbsp cold water (egg wash)
- Flaky sea salt (for finishing)
Instructions
- Season beef: Pat the tenderloin completely dry with paper towels. Season all surfaces with salt and pepper. If time allows, refrigerate uncovered on a wire rack for up to 24 hours for dry-brining.
- Sear: Heat oil in a cast-iron skillet over highest heat. Sear the tenderloin on all sides (including ends) for 60–90 seconds per side — 5–6 minutes total. Do not cook through. Brush all surfaces with mustard immediately. Place on a wire rack and refrigerate uncovered for 30–60 minutes.
- Make duxelles: Blitz mushrooms in a food processor to a rough mince. Sauté shallots and garlic in butter over medium-high heat for 2 minutes. Add mushrooms, thyme, salt, and pepper. Cook 20–25 minutes, stirring often, until completely dry and jammy. Add nutmeg, remove thyme, spread on a tray, and refrigerate until cold.
- Form the roll: Lay a large sheet of plastic wrap on your work surface. Shingle prosciutto into a rectangle. Spread cold duxelles evenly over it. Place the cold beef along the near edge. Roll tightly using the plastic wrap, twist the ends firmly to create a log. Refrigerate 30 minutes.
- Wrap in pastry: Roll pastry to 14 x 12 inches on a floured surface. Remove beef roll from wrap. Place at near edge of pastry. Egg wash the far edge. Roll the beef forward, pressing the seam. Tuck and seal the ends. Turn seam-side down onto a parchment-lined baking sheet. Brush with egg wash. Score the top in a crosshatch. Sprinkle with flaky salt. Refrigerate up to 24 hours or bake immediately.
- Bake: Pre-heat oven to 425°F / 220°C with a rimmed baking sheet inside for 15 minutes. Transfer Wellington to the hot sheet. Bake 25–30 minutes until deeply golden. Check internal temperature: remove at 120–122°F for medium-rare.
- Rest & serve: Rest uncovered on a cutting board for 10 minutes. Slice with a sharp carving knife using a single confident motion. Serve with red wine jus and sides of your choice.
Nutrition (Per Serving, ~⅛ of recipe)
*Nutrition is estimated and will vary based on exact ingredients, pastry brand, and portion size. Always consult a registered dietitian for specific dietary needs.