The Ultimate Homemade Pickles and Peppers Recipe (Quick, Crunchy, & Easy)
If you are looking to elevate your everyday meals with a vibrant, tangy, and spicy kick, this ultimate homemade pickles and peppers recipe is exactly what you need. There is something truly magical about preserving fresh, crisp vegetables in a beautifully balanced, aromatic brine. Whether you are a seasoned home chef or a complete beginner in the kitchen, making your own pickled vegetables at home is a game-changing culinary skill that requires very little effort but yields maximum flavor.
Forget the store-bought jars packed with artificial preservatives, yellow food coloring, and excessive sodium. When you make a quick refrigerator pickle at home, you have complete control over the ingredients, the level of heat, and the crunch factor. This comprehensive guide will walk you through everything you need to know, from selecting the freshest produce and mastering the perfect pickling brine for peppers, to exploring delicious variations that will have your friends and family begging for the recipe.
Whether you plan to pile these tangy treats high on a juicy burger, stuff them into savory tacos, layer them in a gourmet sandwich, or simply snack on them straight out of the jar, this recipe will quickly become a staple in your refrigerator. Let’s dive deep into the art of pickling!
Why You Will Obsess Over This Pickles And Peppers Recipe
Many people are intimidated by the idea of pickling because they immediately picture huge boiling pots, complex water-bath canning equipment, and hours spent sweating in a hot kitchen. The brilliant thing about this specific pickles and peppers recipe is that it is a “quick pickle” or “refrigerator pickle.” This means no special canning equipment is required, and the active prep time is less than 20 minutes!
Here is why this recipe stands out as a high-authority favorite for food lovers:
- Unmatched Customizability: You are the master of your jar. You can use any combination of peppers you love—from mild and sweet bell peppers to fiery habaneros.
- No Canning Required: By utilizing the refrigerator method, you skip the sterilization and vacuum-sealing process. The vinegar and cold temperature of your fridge do all the preservation work.
- Healthier and Preservative-Free: Commercially pickled peppers often contain calcium chloride, polysorbates, and artificial colors. This homemade version relies purely on nature’s preservatives: vinegar and salt.
- Instant Gratification (Almost): While traditional fermented pickles can take weeks to develop flavor, these quick pickles are ready to eat in just a few hours, though they reach absolute perfection after a day or two.
- Budget-Friendly: Buying high-quality artisan pickles can be expensive. Buying a few fresh jalapeños, some carrots, and an onion costs only a fraction of the price.
The Essential Components: Building Your Flavor Profile
To create a truly spectacular jar of pickles, you need to understand the building blocks. High-quality ingredients are the secret to that coveted restaurant-style crunch and flavor.
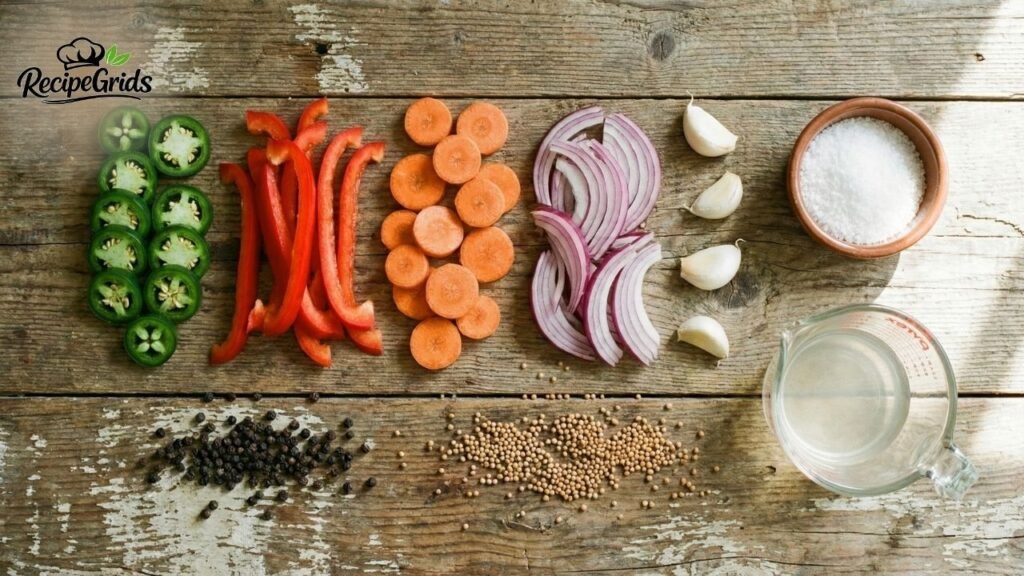
Choosing the Right Veggies for the Perfect Crunch
- Peppers (2 to 3 Cups): The star of the show! You can use firm jalapeño peppers, serrano peppers for extra heat, sweet banana peppers, or colorful bell peppers. Make sure they are fresh, firm to the touch, and free of any soft spots or blemishes.
- Onions (1 Medium to Large): Red onions are the classic choice because they turn a gorgeous, vibrant pink color when exposed to vinegar, elevating the visual appeal of your jar. However, crisp white or yellow onions work beautifully too.
- Carrots (1 Large Cup): Carrots add a natural sweetness and an incredible, hearty crunch that contrasts perfectly with the softer texture of the peppers and onions.
- Fresh Garlic: Do not skimp on garlic. 3 to 5 smashed whole cloves will infuse the entire jar with a deep, savory aroma.
Crafting the Perfect Pickling Brine For Peppers
The brine is the lifeblood of any good pickle. Getting the ratio of acid, water, salt, and sugar right is crucial for both flavor and food safety.
- The Acid (Vinegar – 1 Cup): Distilled white vinegar is the standard choice because it has a clean, sharp, and neutral profile that lets the vegetables shine. However, you can use Apple Cider Vinegar for a fruitier, slightly sweeter flavor, or Rice Vinegar for a milder taste. Always ensure your vinegar is at least 5% acidity.
- The Base (Water – 1 Cup): We use a 1:1 ratio of water to vinegar. This dilutes the harshness of the vinegar just enough to make the pickles palatable while maintaining enough acidity to preserve the vegetables safely in the fridge.
- The Preservative (Kosher Salt – 1 Tablespoon): Always use Kosher salt, pickling salt, or sea salt. Avoid regular iodized table salt, as the iodine and anti-caking agents can make your brine cloudy and give the pickles a slightly metallic taste.
- The Balancer (Sugar – 1 to 2 Tablespoons): Sugar is optional, but highly recommended. It does not make the pickles overly sweet; instead, it cuts through the aggressive bite of the vinegar, creating a beautifully rounded flavor profile.
- The Aromatics (Spices): This is where you can get creative. A standard blend includes 1 teaspoon of whole black peppercorns, 1/2 teaspoon of whole mustard seeds, and a pinch of coriander seeds. You can also add a bay leaf, a sprig of fresh oregano, or dill.
How To Pickle A Pepper: Step-By-Step Instructions
If you have ever wondered how to pickle a pepper correctly to ensure it stays crunchy rather than turning into mush, this detailed breakdown is for you. Follow these steps meticulously for perfect results every time.
Step 1: Prep and Wash the Vegetables
Sanitation is key. Wash your peppers, carrots, and onions thoroughly under cold running water. Pat them completely dry. Moisture from tap water can dilute your brine. Note on slicing: Slice your jalapeños into thin rings. If you want a milder batch, carefully remove the seeds and the white pith (the ribs) from the peppers, as that is where most of the capsaicin (heat) lives. Pro tip: Wear disposable gloves when handling hot peppers to avoid transferring spicy oils to your eyes!
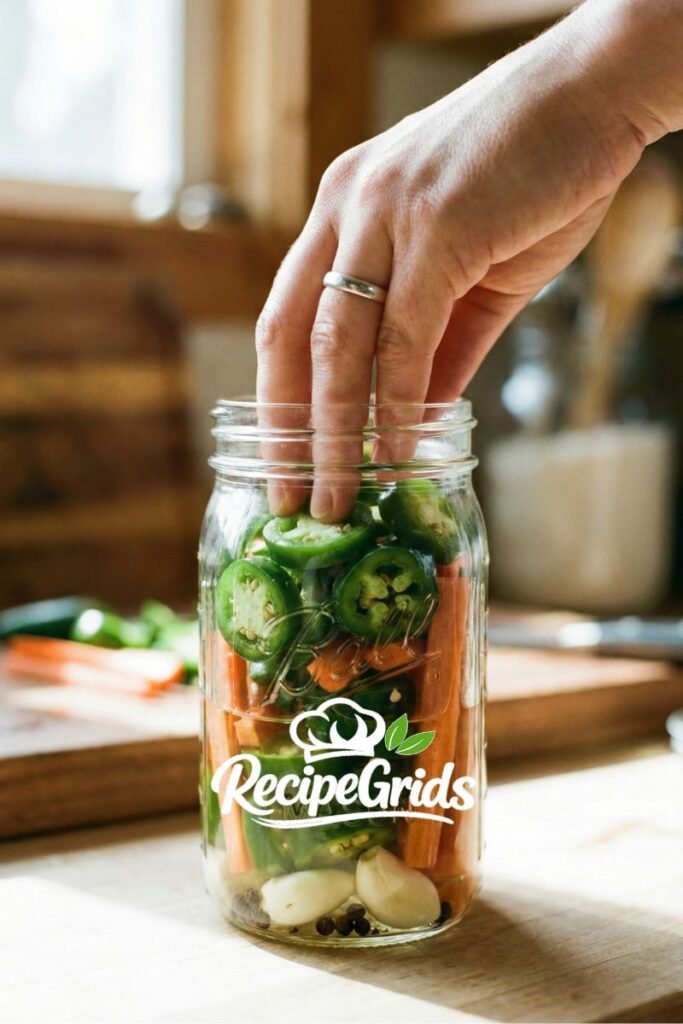
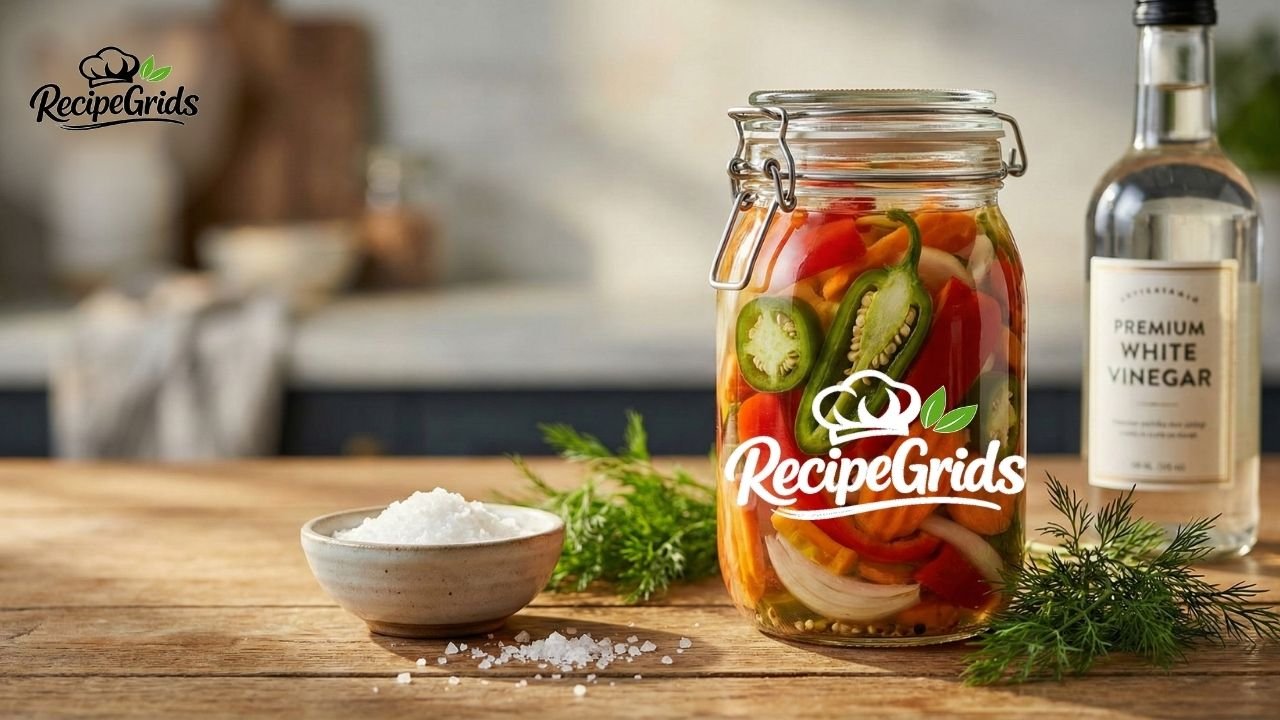
Step 2: Pack the Glass Jars
You will need clean, sterilized glass jars (Mason jars work best). Avoid plastic containers, as they can absorb the pungent odors of garlic and vinegar. At the bottom of the jar, drop in your crushed garlic cloves, mustard seeds, peppercorns, and any other dry spices you are using. Next, tightly pack your sliced peppers, carrots, and onions into the jar. Layer them alternatingly for a beautiful visual effect. Pack them in as tightly as possible without completely crushing them, leaving about half an inch of empty space (headspace) at the very top of the jar.
Step 3: Simmer the Pickling Brine
In a non-reactive saucepan (stainless steel, enamel, or glass—avoid aluminum or unlined copper, which react with vinegar), combine your white vinegar, water, kosher salt, and sugar. Place the saucepan over medium-high heat and bring the mixture to a gentle simmer. Stir occasionally until the salt and sugar granules are completely dissolved. Once dissolved, immediately remove the pan from the heat.
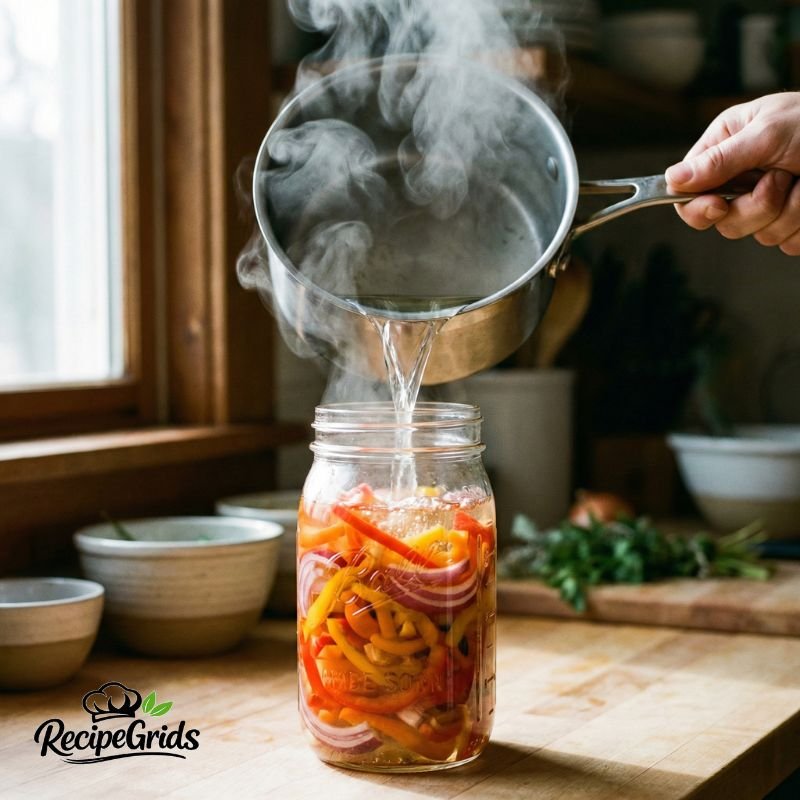
Step 4: Pour, Submerge, and Store
Carefully pour the hot brine over the packed vegetables in your jar. The hot liquid slightly cooks the vegetables, helping them absorb the flavors faster while retaining their crunch. Crucial step: Tap the jar gently on the counter to release any trapped air bubbles. Ensure that all the vegetables are completely submerged under the liquid. If a few pieces are poking out, you can use a small fermentation weight or a folded piece of parchment paper to push them down. Let the jar sit uncovered on your kitchen counter until it reaches room temperature (about 1 to 2 hours). Finally, seal the jar tightly with a lid and transfer it to the refrigerator.
Delicious Variations You Can Try
The beauty of mastering a master brine is that you can tweak the core ingredients to suit any culinary theme. Here are three highly sought-after variations of our recipe:
1. Pickled Hot Peppers and Onions Recipe
This is a staple in many households and the perfect companion for heavy, fatty foods like pulled pork sandwiches or rich stews. How to make it: Focus heavily on spicy peppers—mix serranos, Thai bird chilies, or even a single habanero in with your jalapeños. Pair them strictly with thinly sliced red onions. Add a pinch of cumin seeds and a bay leaf to the brine. The deep heat of the peppers is beautifully offset by the sharp, crunchy, vibrant pink onions.
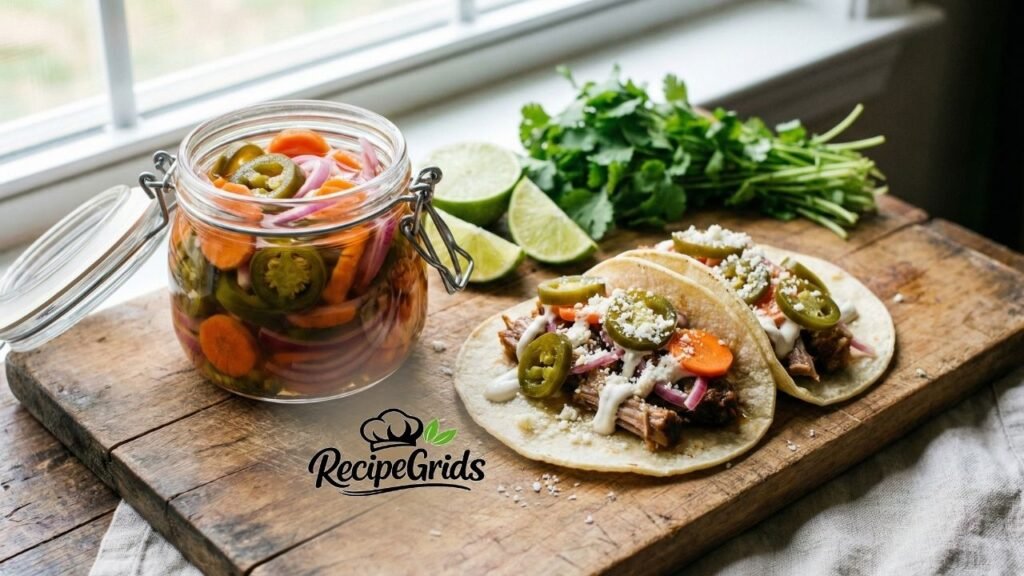
2. Pickled Jalapeno Peppers and Carrots Recipe (Taqueria Style)
If you have ever been to an authentic Mexican Taqueria, you know exactly what this is. It is the glorious, spicy, crunchy side dish served with every plate of tacos. How to make it: Use a ratio of 60% jalapeños (sliced diagonally into thick chunks) and 40% carrots (sliced thickly). The secret ingredient here is Mexican Oregano. Add one full teaspoon of dried Mexican oregano and a splash of olive oil (just a few drops) to the top of the jar before sealing. The carrots absorb the heat of the jalapeños, making them incredibly addictive.
3. Sweet Pickled Peppers
Not everyone loves intense heat. If you prefer a sweet, tangy, and mild condiment that tastes amazing on a turkey club sandwich or mixed into a summer pasta salad, this variation is for you. How to make it: Ditch the hot peppers entirely. Use mini sweet bell peppers, yellow banana peppers, and sweet Vidalia onions. In your brine, increase the sugar from 2 tablespoons to a full 1/4 cup (or even 1/3 cup if you like them candied). Add a dash of celery seed and a pinch of turmeric to the brine for a gorgeous golden color.
Expert Tips For The Crunchiest Pickles
Nobody likes a soggy, mushy pickle. To guarantee maximum crunch, keep these expert tips in mind:
- Freshness is Non-Negotiable: Pickles will only ever be as crisp as the raw vegetables you start with. Do not use wrinkled, old peppers.
- The Ice Bath Hack: If you are worried your peppers aren’t crisp enough, soak the sliced veggies in a bowl of ice water for 30 minutes before packing them into the jars.
- Avoid Boiling the Veggies: Never boil the peppers in the brine on the stove. Always pour the hot brine over the raw vegetables in the jar. Boiling them will cook them completely, resulting in a mushy texture.
- Patience: While you can eat them after 3 hours, the crunch and flavor truly peak after 48 hours in the cold environment of your fridge.
Culinary Pairings: How to Serve Your Creations
Once you have your homemade pickles and peppers ready, the culinary possibilities are endless:
- Burgers & Hot Dogs: Dice them up to create a spicy relish that cuts through the richness of the meat.
- Tacos & Nachos: The Taqueria-style carrots and jalapeños are a must-have for Taco Tuesdays.
- Charcuterie & Cheese Boards: Serve a small bowl of sweet pickled peppers alongside sharp cheddar, brie, and cured meats.
- Salads & Bowls: Toss a handful into a grain bowl or a potato salad for an instant flavor upgrade.
- Brine Re-use: Don’t throw the leftover juice away! Use the spicy, tangy brine as a marinade for chicken, or splash it into a Bloody Mary cocktail.
Storage and Shelf Life Guidelines
Because this is a refrigerator pickle recipe, the rules for storage are very specific:
- Always Refrigerate: These are not shelf-stable. They must live in the refrigerator at all times once they have cooled down from the hot brine pour.
- Shelf Life: When kept continuously refrigerated in a tightly sealed jar, these pickles will stay fresh, crunchy, and delicious for up to 2 months. (Though they rarely last that long before being eaten!)
- Utensil Hygiene: Always use a clean, dry fork or spoon to extract the pickles from the jar. Introducing bacteria from your fingers or a dirty utensil will cause the jar to spoil rapidly.
Frequently Asked Questions (FAQs)
Can I substitute white vinegar with something else in this pickles and peppers recipe?
Yes, absolutely! While white vinegar provides the classic, sharp pickle flavor, Apple Cider Vinegar (ACV) is a fantastic substitute that adds a mild, fruity sweetness. You can learn more about different types of vinegar for cooking to experiment with flavors. Just ensure whatever vinegar you choose has an acidity level of at least 5%. Do not use balsamic vinegar, as the flavor is far too overpowering and it will turn your vegetables an unappealing brown color.
Why did my pickled peppers turn out soft and mushy?
The most common culprit for soft peppers is heat. If you boiled the brine and let it sit at a rolling boil for too long, or worse, if you added the peppers into the saucepan while the brine was cooking, they will overcook. Additionally, using old, limp peppers from the start will result in limp pickles. Always start with crisp produce and only pour the brine over the veggies in the jar.
Is it safe to reuse old pickling brine for a new batch of peppers?
From a food safety and quality perspective, it is highly recommended not to reuse old pickling brine for a fresh batch of vegetables. As the original vegetables sat in the brine, they released their own natural water content, which diluted the acidity of the vinegar. Reusing diluted brine means it might not have the strength required to safely preserve a new batch, and the flavor will be significantly muted. Always whip up a fresh batch of brine—it only takes 5 minutes!
Are these safe from Botulism?
Yes! Botulism thrives in anaerobic (oxygen-free), low-acid environments at room temperature. Because this recipe utilizes a highly acidic vinegar brine and is stored in the cold temperature of the refrigerator, the risk of botulism is virtually non-existent. For more detailed guidelines on safe food preservation at home, you can always refer to the National Center for Home Food Preservation. This is why refrigerator pickling is the safest and easiest method for beginners.
Looking for something sweet and nutritious to balance out all that savory, spicy crunch? Check out our recent Stars and Honey Protein Bars Review for a perfect grab-and-go snack.
For more mouth-watering, easy-to-follow guides and culinary inspiration, make sure to subscribe to the RecipeGrids newsletter. If you tried this ultimate recipe at home, drop a comment below and let us know which variation was your favorite!